Showing posts with label kid learning. Show all posts

Five Ways to Get your Kids Excited about Gardening!

11 March 2012
Antonio M. Rosario


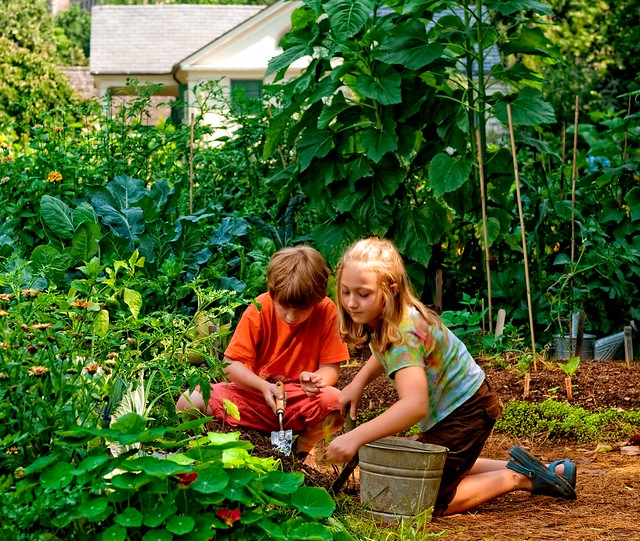
Gardening is a great learning exercise for children of all ages; it teaches them how things grow, where the food we eat comes from and can help get picky eaters to try new foods.  Besides teaching valuable lessons about food, it can also teach a variety of useful life skills, such as; how to be patient(it takes time for plants to grow), dependability (plants need you to be there and care for them every day), responsibility (to take the initiative), and also places respect for environment in your child's hands.  Whether you are able to grow 1 plant or 100, it's a worthwhile summer activity that is bound to teach your children many valuable life skills.


If you don't have much space, or live in an apartment building where you cant plant in the ground, find a plant or two that you can grow in a pot!  There are also many "co-op" gardens, where you can rent a space in a shared garden or pay to receive a portion of their crops.  Many of these ask or require participants to help tend the plants and/or maintain the garden.  For those with less time, this may be the best option.


Tips for "growing" a successful gardener in your child:


1.  Start small. If this is your (or your child's) first time gardening, don't overdo it.  Many people make the mistake of trying to work with too many plants at once or learning too much at once.  With new gardeners, especially children, it is important to not let anyone get overwhelmed.  Chances are, if you let that happen, a lot of your plants will suffer due to your frustration.

2.  Don't pressure.  Encourage your children, but don't push them to enjoy it.  Last year, it took three different times before our seeds were actually in their pods.  The first time, she got distracted, so I put it all away, the second time, she got more interested in making signs for the plants, so I embraced it as an craft opportunity, and the third time, she sat with me for over an hour and planted every little seed herself.  By letting it be her decision, she came to be interested in the plants by herself, and then devoted all of her attention to it.  

3.  Set a Routine.  Plants need attention.  Some days they need more than others, but you should never go a day without checking on your plants.  Since children and plants both thrive on attention and routine, the two will go together easily.  I always like checking on the plants right after breakfast, and then again shortly before dinner.  If I make this a habit, that every day at these times we go check on the plants, it fosters a sense of responsibility and normalcy to what we are doing. 


4.  Let them explore.  There's many ways that you could do this, for one example, you could let your child have one plant that is all their own.  You let the child do all of the work nurturing it and helping it grow.  (You can of course provide suggestions, ie. Your plant is looking a little sad today... do you think it needs something?) This develops a sense of pride when their plant does well, as well as the consequences if it doesn't.  (of course, if you aren't the type to let a plant die, like myself, there's nothing saying you can't water it on the side....)  For a second example, you can let your child take the lead in your garden exploration.  Let them go ahead and look for new fruits and vegetables, find worms, bugs, weeds, etc.  You could take it a step further and make a chart before you go out with things to count, like Flowers on the Rose Bush, or Weeds we pulled, etc and let your child mark when they find this item!


5.  Show and Tell.  Let your child be proud of the things that they have grown.  Encourage them to help prepare it in the family meal, draw/take pictures of the garden, and talk about it.  Also encourage your child to take part in the gardening process from start to finish.  Let them help pick out seeds and pots and dirt and keep it up all through the summer!


I bet if you follow these simple tips that you will soon have a master gardener helping you and excited about all the new, fresh things they've discovered!

Let the Gardening Begin... How to start seeds!

08 March 2012
What do Eggshells, Dirt and seeds have in common?  Nothing if you are a normal person... but if you're a gardener, it could mean a lot to you.  There are many different ways to start a seed.
For most, Jiffy Greenhouses are the way to go.  They're easy, the dirt is already there, all you have to do is add water and the little peat pellets puff up and you can press in your seeds, pop the lid on and you're done.

I've done these in the past, and they are easy, they are probably the most compact of all of the options out there, but they aren't very green.  I have to dispose of, or store, this large plastic case, and there have been times I've found that my little seedlings weren't able to push their roots through the meshy casing that is supposed to dissolve over time, and their growth has been stunted.

Plus, I'm all about being green, so this year we're trying several new "green"  seed starting techniques.

The first of these techniques we put into effect this past weekend when we started our first batch of seeds (only 4 varieties of plants, of the longest germinating variety.)  Next week, we'll be starting a larger batch, and sharing another green seed starting technique with you.

I read about this technique on some website, I really wish I had bookmarked it, because it was a great website...  *facepalm*  For this technique, it requires some planning ahead.  Whenever you use an egg, try to crack just the top off on the smaller end of the egg.  Rinse it out and let it dry upside down, and then when it's dry, store it in a spare egg carton.  When you've got a dozen or two, you're ready to start some seeds.

I labeled my egg shells with a permanent marker indicating what seeds I was going to plant inside, then filled them with dirt.  After they were filled, I watered them a little bit, then put my seeds in, and misted the eggshells all with water to help the seeds settle a little.  I think they not only are useful, but kind of pretty in their own way.  I think they'll look very cool when all the seeds have sprouted :)


When you're ready to plant them in the ground, all you have to do is crush the egg in your hand and put it in the ground.  The egg shells are very good for the dirt and the seedling and will help them grow.

The Kohlrabi is already sprouting!  Just 3 days after planting!!


I also saved the shards from the top of the egg that I cracked and have crushed them up and will mix them into my soil before I add my plants.

You may be asking yourself, how do I know when to start my seeds?  You don't want to start them too early and have to transplant them inside before they can go outside, but you also don't want to get too late of a start and shorten your available harvesting time.

First, know your zone.  You can find your gardening zone here, and by knowing your zone, you'll become familiar with what types of plants you can grow.

Second, know your Average Last Frost Date.  This will give you the baseline to time your seed starting.

Third, read your seed packet.  Each seed packet usually comes with information such as; whether the plant prefers sun or shade, what depth to plant your seed, any germination instructions, how long it will take to bear fruit, how long it will take to sprout, when to plant in the ground and any other information that you need to know in order to start the seed.

I started these four because their instructions all indicated that they should be started 8-10 weeks before the average last frost date.  For my area, my average last frost date is April 25th.  Right around this time, I'll be able to begin hardening off my seedlings and getting them ready to go into the ground or pots. 


These are the four different types of plants that were started on 3/4/12.   Expect some articles on the individual plants themselves coming this week!
Related Posts Plugin for WordPress, Blogger...